








Handy Heater Turbo Cleaning: The Complete Step-by-Step Guide to Safe, Effective Maintenance
A compact turbo heater is one of the most useful things you can own during the cold months. It warms a small room quickly, takes up almost no space, and is easy to move around. But there is one thing most owners forget: the heater works best only when it is clean. Over weeks of use, dust, lint, pet hair, and tiny fibers collect on the grille, around the heating element, and inside the air vents. That buildup quietly reduces airflow, makes the heater work harder, creates that familiar “burning dust” smell, and, in the worst case, becomes a safety concern.
In this guide, you will learn exactly how to clean a handy heater turbo safely, how often to do it, what tools you need, what to avoid, and how to fix common problems that come from a dirty heater. Everything is explained in simple steps so that anyone can follow along without technical experience.
- Why cleaning your turbo heater matters
- Know the parts that collect dust
- Tools and materials you need
- Safety rules before you start
- Step-by-step cleaning instructions
- How often should you clean it?
- Dos and don’ts
- Troubleshooting problems caused by dirt
- Storage and off-season care
- Tips to keep it cleaner for longer
- Frequently asked questions
Why Cleaning Your Turbo Heater Matters
Cleaning is not just about appearance. A heater moves a large amount of air through a small body, which means it constantly pulls in whatever is floating around your room. Here is what regular cleaning does for you:
- Better heat output: Clear vents allow air to flow freely, so the room warms up faster.
- Lower electricity waste: When airflow is blocked, the heater runs longer to reach the same temperature.
- Less burning smell: Dust that lands on a hot element burns off and creates an unpleasant odor.
- Improved safety: Lint and hair near hot parts are a fire risk. Clean parts help prevent overheating.
- Longer lifespan: Overheating from blocked airflow shortens the life of the fan, the element, and the internal safety switch.
- Cleaner air: A dirty heater can blow dust and odors straight into your living space.
Know the Parts That Collect Dust
Before cleaning, it helps to understand where dirt actually builds up. Most compact turbo heaters have a similar layout: a front grille where warm air exits, a heating element behind it, a small fan, an air intake on the back or sides, and a power cord with a plug.
The front grille and the air intake are the biggest dust traps because air passes through them constantly. The heating element collects fine dust that you often cannot see until you smell it burning. Always check your user manual as well, because the exact design may vary slightly between models.
Tools and Materials You Need
You do not need anything expensive. Most of these items are already in your home:
- A soft, dry paintbrush or a clean makeup brush
- A vacuum cleaner with a soft brush attachment
- A can of compressed air (optional but very helpful)
- Two clean microfiber cloths: one barely damp, one dry
- Cotton swabs for tight corners
- A small bowl of lukewarm water with a drop of mild dish soap
- A soft toothbrush for stubborn dust on the outer casing
- A flashlight to inspect the inside of the vents
Safety Rules Before You Start
- Work on a flat, dry surface in a well-lit area.
- Keep liquids away from the vents, switches, and power cord.
- If the cord or plug looks cracked, melted, or discolored, stop and do not use the heater until it has been checked by a qualified technician.
- Do not open the heater’s inner casing unless your manual allows it. Opening sealed parts may be unsafe and can affect your warranty.
Step-by-Step: How to Clean a Handy Heater Turbo
Step 1: Unplug and Let It Cool
Switch the heater off, pull the plug from the socket, and let it rest for at least 30 minutes. The grille and body can stay hot for a while after use, so be patient. Place it on a towel or a clean table so dust does not scatter on your floor.
Step 2: Loosen the Dust With a Soft Brush
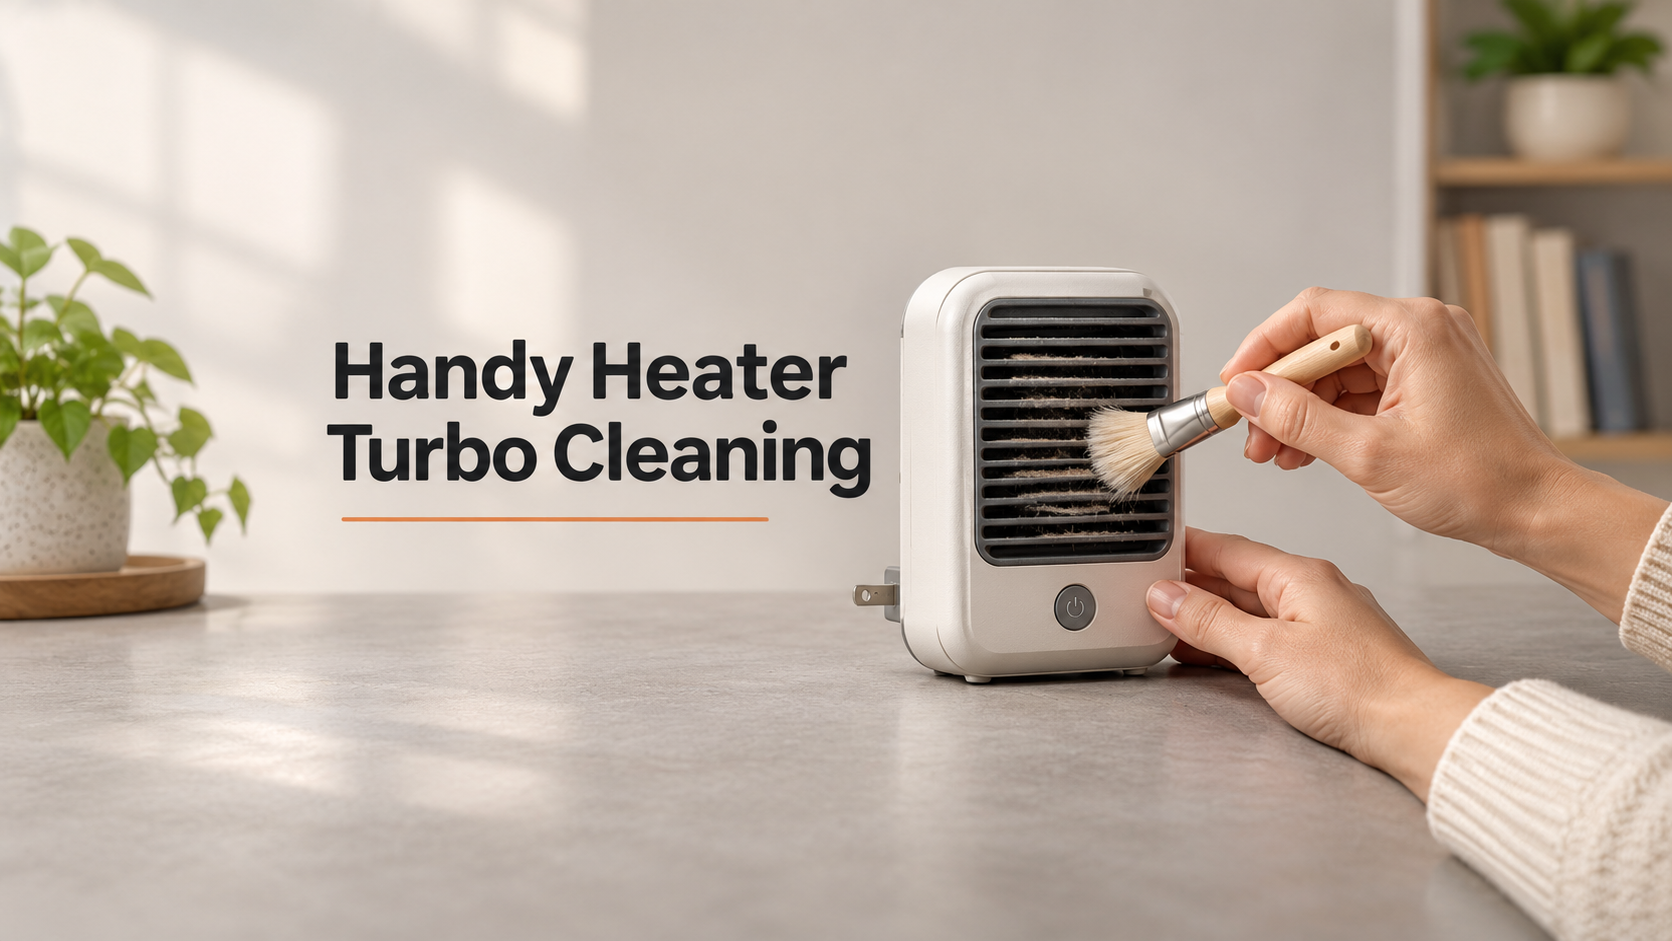
Use a dry paintbrush to gently sweep across the front grille and along the slots. Brush in one direction to push the dust out instead of deeper inside. Repeat the same motion over the side and back vents. This step loosens packed lint so it can be removed easily in the next step.
Step 3: Remove Dust With a Vacuum or Compressed Air
Attach the soft brush head to your vacuum cleaner and run it slowly over the grille and the air intake. The suction pulls out the dust you just loosened. For deeper areas, short bursts of compressed air work well. Hold the can upright and a few inches away, and blow from the outside toward the vents in short puffs. Do this outdoors or near an open window because dust will fly out quickly.
Step 4: Clean the Outer Body
Dip a microfiber cloth into lukewarm water mixed with a tiny drop of mild dish soap, then wring it out until it is barely damp. It should never drip. Wipe the casing, the top, the sides, and the base. Use a cotton swab for edges and around the buttons, and a soft toothbrush to lift stuck-on grime. Avoid pressing hard around the vents so no moisture slips inside.
For the power indicator and control area, use a dry cloth only, or a cloth that is almost completely dry.
Step 5: Dry Completely and Inspect
Wipe everything again with a clean dry microfiber cloth. Then leave the heater in open air for at least 30 minutes so any trace of moisture evaporates. While it dries, inspect the cord from end to end, check the plug pins for dark marks or bending, and make sure the grille is not warped or cracked.
Step 6: Test Before Regular Use
Once it is fully dry, plug it in and turn it on at the lowest setting for a few minutes. A tiny amount of smell may appear on first start if some dust remains on the element, but it should disappear quickly. If the smell is strong or continues, turn the heater off, unplug it, and repeat the cleaning.
How Often Should You Clean Your Turbo Heater?
The right schedule depends on how often you use it and the environment. Rooms with carpets, pets, or lots of foot traffic produce much more dust than a clean, tiled bedroom.
As a simple rule, do a quick brush-and-vacuum of the grille every one to two weeks during heavy use, and a full cleaning every month. Do one deep cleaning at the start and at the end of the cold season.
Dos and Don’ts of Heater Cleaning
Troubleshooting: Problems Caused by a Dirty Heater
If your heater is acting strangely, dirt is often the reason. Here are the most common issues and what to do:
| Problem | Likely Cause | What to Do |
|---|---|---|
| Burning or dusty smell | Dust burning on the hot element | Unplug, cool, then brush and vacuum the grille and vents. Test again on low. |
| Weak heat or slow warm-up | Blocked air intake or grille | Clean the intake and front slots thoroughly. |
| Heater shuts off by itself | Overheat protection triggered by blocked airflow | Unplug, clean all vents, let it cool, and restart. |
| Louder fan noise | Lint around the fan area | Use compressed air through the vents in short bursts. |
| Rattling sound | Loose debris or a loose part | Shake gently with the plug removed; if the noise remains, consult a technician. |
| Turns on but no heat | Possible internal fault | Do not keep using it. Contact the seller or a qualified technician. |
If the problem remains after thorough cleaning, stop using the heater and have it inspected. Heating appliances should never be used with a suspected electrical fault.
Storage and Off-Season Care
When winter ends, do not simply push the heater into a corner. Proper storage keeps it ready for next season:
- Give it a full cleaning as described above.
- Make sure it is completely dry.
- Loosely coil the cord without bending it sharply or wrapping it tightly around the body.
- Cover it with a cloth bag or place it in its original box to keep dust out.
- Store it in a dry, cool place away from moisture, such as a shelf in a cupboard, rather than a damp basement or bathroom.
Tips to Keep Your Heater Cleaner for Longer
- Place it on a hard, flat surface: Carpet fibers and bedding quickly clog the intake.
- Keep it clear of curtains, clothes, and furniture: This improves airflow and safety.
- Do a 30-second weekly wipe: A quick pass with a dry cloth stops dust from packing in.
- Vacuum the room regularly: Less dust in the room means less dust in the heater.
- Control pet hair: Groom pets often and keep the heater out of their favorite napping spots.
- Do not dry laundry on or near it: Lint and moisture are a bad combination.
Frequently Asked Questions
Can I wash my turbo heater with water?
No. Never submerge it or spray water into it. Only the outer casing may be wiped with a barely damp cloth, and only when the heater is unplugged and cool.
Why does my heater smell when I turn it on after a long time?
Dust that settled during storage burns off the element when it heats up. Cleaning the heater before first use usually removes the smell. If the smell is sharp or like melting plastic, switch it off at once and have it checked.
Is it safe to use a vacuum on the heater?
Yes, a vacuum with a soft brush attachment is one of the best tools for cleaning the grille and vents, as long as the heater is unplugged and cool.
Can I use cleaning sprays or alcohol?
It is best to avoid sprays and strong chemicals. They can damage the plastic, leave residue that smells when heated, and let moisture enter the vents. Mild soapy water on a barely damp cloth is enough for the outside.
How do I know it is time to clean the heater?
Signs include a dusty smell, weaker heat, visible lint on the grille, louder fan noise, or the heater switching off on its own. If you notice any of these, it is time for a cleaning.
Should I open the heater to clean inside?
Only if the manufacturer’s manual specifically says it is allowed. For most users, cleaning through the vents with a brush, vacuum, and compressed air is enough and much safer.
Final Thoughts
Cleaning your handy heater turbo only takes about 15 minutes, but it makes a real difference: stronger heat, a fresher room, lower energy waste, and a much safer appliance. Make it a habit: unplug, brush, vacuum, wipe, dry, and test. Do this regularly and your heater will keep you warm reliably through every winter.